
Almost everyone knows how to set up an email – or download a specific application – from a large provider such as Google, Outlook and Yahoo! on your desktop machine or on your smartphone. However, when registering a modified email address, the situation is not that simple. That’s why in this article we’ll show you how to set up your email on iPhone and Mac.
Keep in mind that Apple’s operating systems are constantly evolving, which means that you may encounter slightly different screens during the process. But don’t worry, the steps are the same on every version of i OS and mac OS. If you use a smartphone with Android OS, you must view this another tutorial here.
Set up email account on iPhone
Setting up an email account on your iPhone is as easy as opening the app mail on your smartphone and follow an installation menu. Things get a bit tricky when setting up a server called Host, but rest assured, we will promote the process step by step with you. Are we going there?
1. Open the Settings app
Open the app on the home screen of your iPhone. modifications (with the gear icon) and go to the option Passwords and accounts. Then choose Add Account. You will see the screen below:
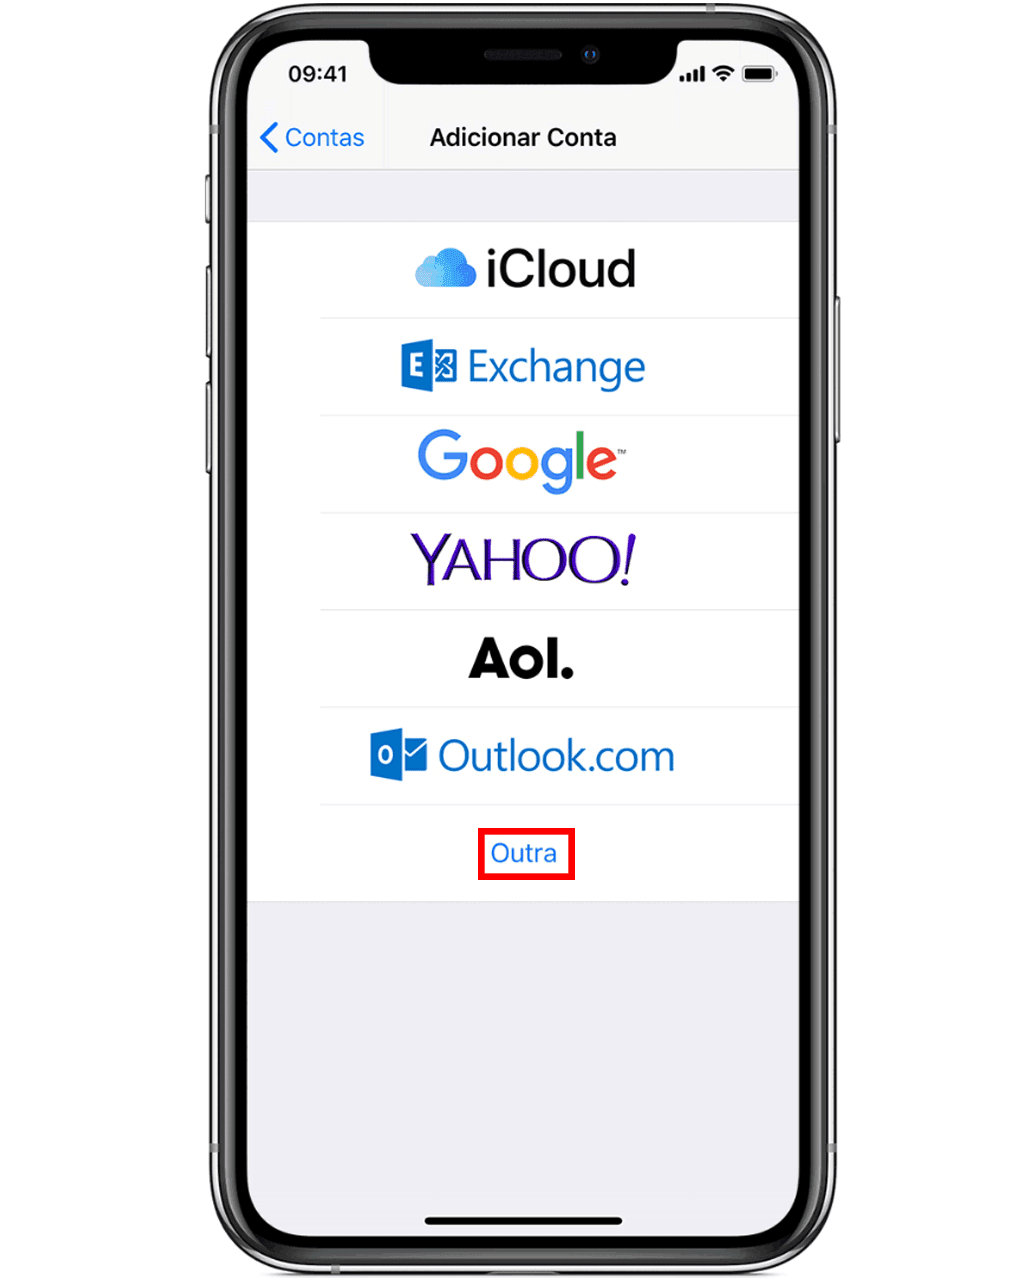
Here you choose which e-mail provider you want to use. In our example we click on “Other” to add the account manually, because we add a generic email to a site hosted by Luhoster.
2. Enter your e-mail account information
Here the process remains fairly simple and clear. Simply enter your name, your e-mail address (eg Email@domain.com) and your password. If you wish, you can even enter a description of this account, such as & # 39; Work account & # 39 ;.
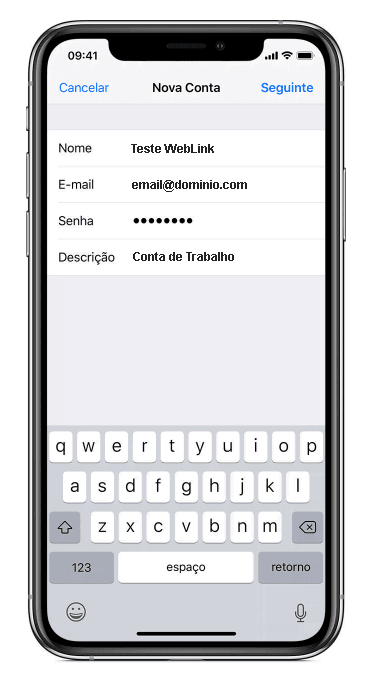
Then click on “Next” in the top right to continue with the installation. The application then attempts to find the settings of this email to automatically complete the process. If all goes well, just press OK and complete the installation. Otherwise go to step 3.
3. Complete Manual way Account settings
If you read this section, the automatic setup probably did not work and the app could not find the settings you entered. Therefore, the output is to enter the server data manually.
First select whether the protocol will be used IMAP or POP. The first download e-mails from the server to the device, which means that you will lose the message if you delete the data from your phone. The second is more recommended for those who have access to the account of multiple devices because emails are stored on the server.
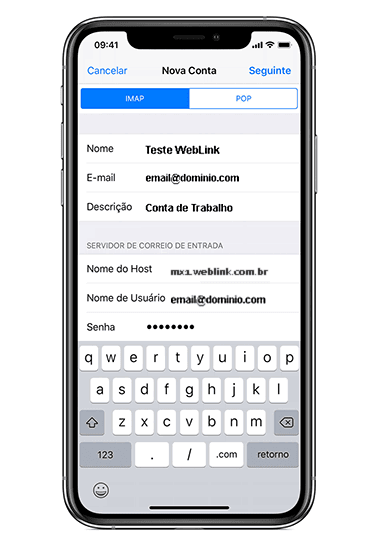
Let’s put mx1.luhoster.com in the host name information that determines the SMTP server. The same information can be used on both the outgoing and incoming servers. If you have any questions, please contact our 24/7 support team and they will be at your service. If your professional e-mail account is hosted on another service, contact your provider for this information!
How to set up an email account in macOS
Because of the uniform way in which Apple handles its operating systems, the process on MacOS does not differ much from the process we just described on iOS.
1. Open the Mail app
Click on the tab to start the process mail in the toolbar at the top of the screen – the email logo is right next to the Apple symbol. Click there Add Account. You will come across a screen that is very similar to the screen we saw on iPhone, where you have to select your email provider.
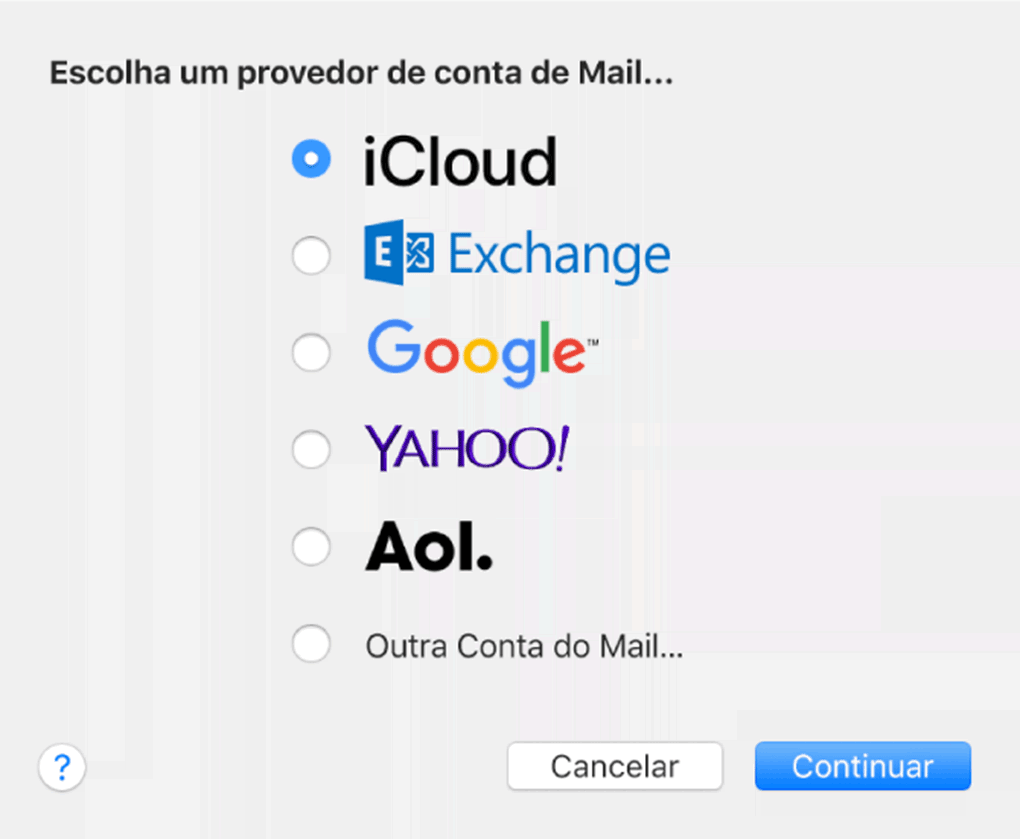
In our tutorial, we choose “Another email account …” because we use a luhoster Business account.
2. Enter your details
This is the time to enter your details, including Full name, E-mail address and password. That is, just like on the iPhone. Then just press to create.
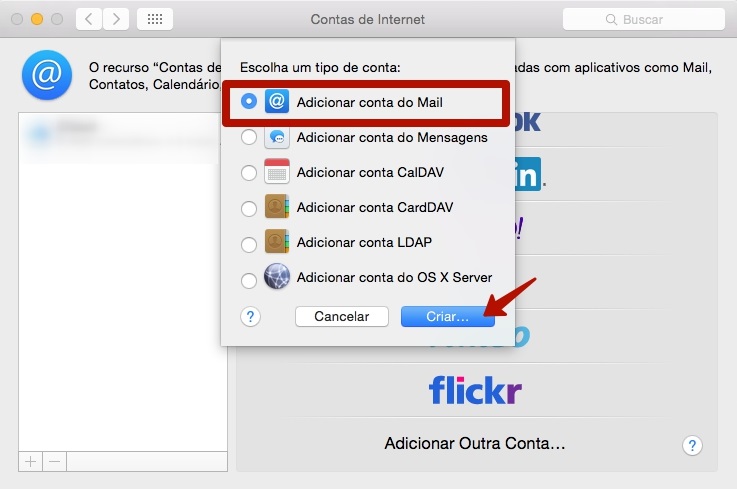
3. Add e-mail server
Then we come to the moment that perhaps the most complex of the operation is, but nothing that is very difficult to achieve. You must add the Mail server to be user name (in this case the e-mail account) and choose between POP3 or IMAP.
Remember here that POP stores data on your computer, while IMAP leaves a copy of messages on the server – so that they can be accessed from multiple devices.
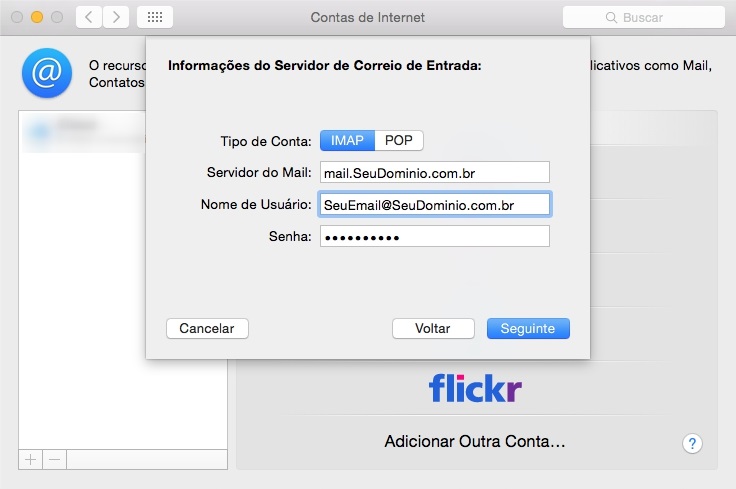
It is very important to note that in macOS the standard for the mail server is “mail.SyDomain.com”, different from what we found on iOS. An example would be & # 39; mail.luhoster.com & # 39; if your professional e-mail service domain is hosted by us.
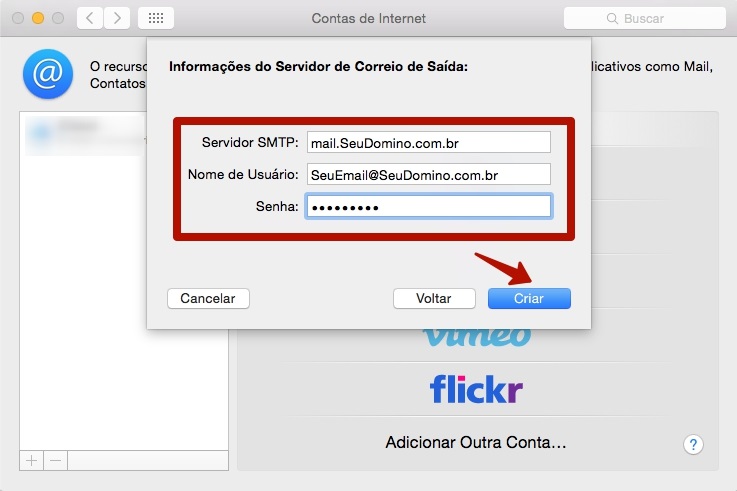
Sometimes the Mail application does not have access to all server information with this first login. If this happens, you must enter information about the outgoing server (SMTP). Ultimately, the data you enter here is the same as the one you entered in Mail Server, and the SMTP server has the format of “mail.YourDomain.com”.
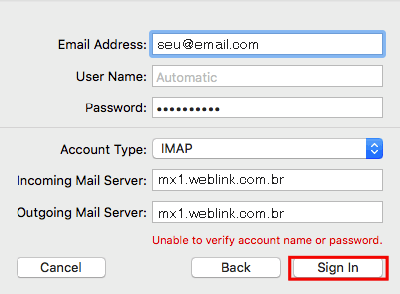
There is a possibility that this process will fail with the following error message:Unable to verify account name or password“.
Don’t worry, this is normal and enter the email server information manually.
This is where your e-mail address, e-mail account password, and account type (IMAP or POP) go – we recommend IMAP for your security and performance.
Also enter the incoming and outgoing server, which we can use “mx1.luhoster.com” as a kind of wildcard.
You can leave the username blank for now, because the email client can delete it automatically.
4. Check the server certificate
To complete the process, we give you a tip. Before you click to connect, go to the option Show certificate and click on the white box with the text “Always trust this certificate …”.
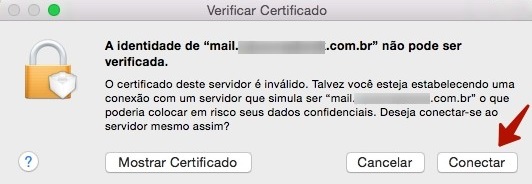
Doing this will prevent you from having to deal with this verification screen every time you send or receive an e-mail. Do this for both input and output information.
5. (Optional) Enter server port
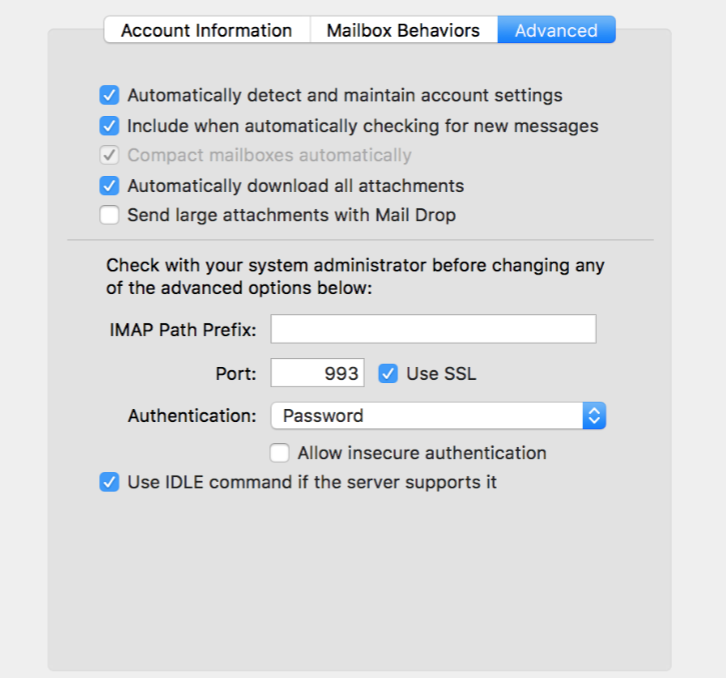
Sometimes it is a good idea (or even a necessity) to inform the server port, to prevent messages from being stored in the firewall for random reasons.
Look in the control panel of your site to see the relevant port for your e-mail. However, the result should look something like the screen below:
HOW TO CREATE RESUME ONLINE?
conclusion
In this tutorial you learned how to set up an email account on Apple operating systems, regardless of whether you use an iPhone (iOS) or macOS. Using the Mail app for a large provider account is fairly easy.
It becomes a bit more complicated if you want to use a professional e-mail. But with the right information in hand, everything can be solved within a few minutes. Make sure you point to the right server and find the right port for the configuration.
If you encounter an error during the process, it is possible that the server is not responding at this time or that some data is incorrect. We recommend that you try again before doing anything else. Contact your e-mail provider’s technical support if it goes wrong again. Good luck and until the next tutorial!


